

How To Design an Off-Grid Solar System
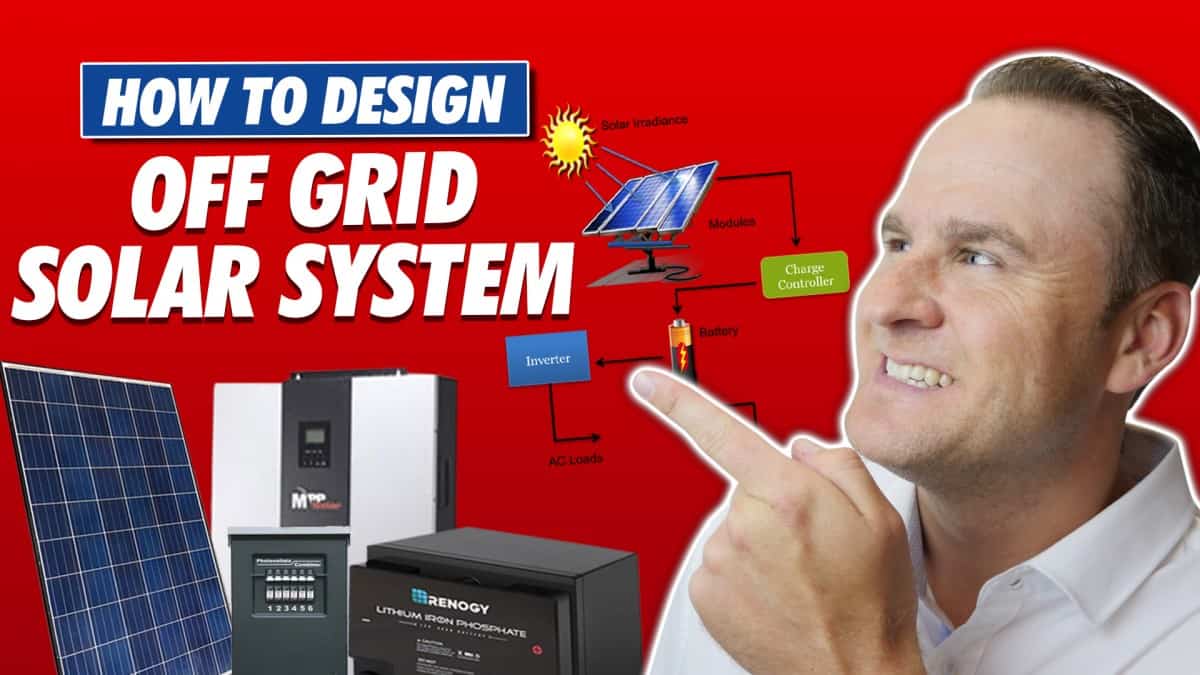
Six Steps to Design an Off-Grid Solar Power System
Thinking of designing an off-grid solar panel system? Here are six steps that will get you started.
#1 Determine how much power is required
This is the most crucial step and many people skip it. Please, do not skip this step!
Planning a solar system is similar to planning a car trip without knowing how far you’re going and what vehicle you will use. “Okay, let’s go get gas for the trip. But, how much gas do we buy?” The answer to this depends on how far you will need to drive. The same goes for solar installation. It is not enough to say, “I’m going to use 2 solar panels and a battery, and I hope it will suffice for my needs.” It is important to keep track of everything that your system will power. Even small changes can make a huge difference.
#2 Determine the number of batteries that you will need
Once you have determined how much power your system requires, you can then calculate how many batteries you will need to store the generated power. The following questions are important when deciding the number and types of batteries to use:
- Are you looking for enough storage to last a few days or enough to hold power for several days?
- Are you able to use another source of power, such as a generator or turbine?
- Are the batteries to be kept in a warm place or a cold area?
The temperature at which batteries can be stored is around 80 degrees Fahrenheit. You will need more battery banks if the temperature drops below 80 degrees Fahrenheit. These answers will affect the cost and size of your battery bank.
Which voltage battery bank are you looking for? 12V, 24V, or 48V? Higher voltage battery banks are required for larger systems. For instance, a basic 12V battery bank is sufficient to power your RV and charge your phone. However, if you are looking to run more than 2000 Watts per hour, then you should consider 48-Volt or 24-Volt systems.
#3 Determine the number of solar panels required for your area and year.
Online off-grid calculators can help you determine how many solar panels are needed for your system. Once you have calculated how much energy you will need per day, it is time to figure out how many hours of sunlight you will need. The “sun hours” are the energy available from the sun to a given location.
The number of “sun hours” refers to the amount of sunlight that shines on your panels at a certain angle during the day. It is the same as sunlight shining directly on solar panels when it has the most power. The sun’s brightness is not the same at 8 AM as it is at noon. Therefore, an hour of morning sunlight may be considered half an hour while the hour between noon and 1 PM would be considered a full hour. You don’t get as much sunlight in winter if you don’t live near the equator.
If you live in an area with the most sunlight in a year, then you can be sure that you won’t run out of solar energy. You don’t have to plan for winter if you are at a summer camp. However, if you’re living in a year-round home or hunting cabin, you will need to know the number of sun hours that corresponds to winter.
#4 Choose a solar charger (charge controller)
Okay, so now that we have batteries and solar panels, we need to find a way to transfer the energy from the solar panels into the batteries. To determine the size of the solar charge controller needed, you will need to divide the Power (Watts) received from the sun by the battery bank Voltage. This is only a rough calculation. For safety, add another 25%.
There are a few things you should consider when selecting a charge controller. There are two main types of charge controllers: PWM or MPPT. A PWM charge controller can be used if the voltage of your solar panel array is equal to the voltage of your battery bank. You can use PWM if you have both a 12V panel and a 12V battery bank. An MPPT charger controller is required if your solar panel voltage differs from the battery banks. For instance, you will need an MPPT charger controller if you have a 20V panel and a 12V bank.
#5 Choose an inverter
Once you have charged the batteries efficiently, it is time to make the power available. This step can be skipped if you only run DC loads directly from your battery bank. If you’re powering AC loads, however, you will need to convert the direct current generated by the batteries into an alternating current. It is important to determine the type of AC power that you require. The standard for North America is 120/240V split-phase, 60Hz. It is 230V single 50Hz in Europe, most of Africa, and some countries in South America. It can be a mixture of both Voltages and Frequencies on some islands. Some inverters can be configured to switch between Frequencies and Voltages, while some are fixed. To ensure that the inverter meets your requirements, make sure you carefully read the specifications.
You will need to determine if any of your appliances use 240V or just 120V if you are using the North American standard. You can wire your inverter to either 120V or 240V. Some inverters can be stacked and each outputs 120V. However, when wired together or stacked, they can also produce 240V. Other types are limited to 120V and cannot be stacked. You should read the specifications to find out which inverter is best for you.
It is also important to determine how many Watts your inverter will require to power. You created loads listing in step 1. This list considered both the surge and constant Wattage of your loads. An inverter is made for a particular Voltage battery bank.
For example, an inverter can be used to power a 12-24 Volt battery bank or a 48-Volt battery bank. Before you buy the inverter, you should know which Voltage battery bank you have. This is especially important if you plan on growing your system. You will need a higher Voltage inverter if you have plans to add a larger battery bank. You can either choose to go with the higher Voltage in the beginning or change your inverter later.
#6 Balance the system
Okay, so we are cheating by lumping all other components into one final step to balance the system. But many other small components are needed including the fuses and breakers are for overcurrent protection. Other things to consider include:
- What breaker boxes to use?
- How to mount solar panels?
- What size wire will you need?
After you have completed these six steps, you can start designing your DIY off-grid solar systems.